Windows - Hyper-V
Hyper-V has support for running with OpenHCL when running on Windows. This is the closest configuration to what Microsoft ships in Azure VMs, the only difference being that Azure uses Azure Host OS (as opposed to Windows Client or Windows Server).
Get a Windows version that has development support for OpenHCL
Note that Windows Client and Windows Server do not have production support for OpenHCL VMs (Microsoft does not support production workloads on OpenHCL VMs on Windows Client and Windows Server), but certain versions have development support for OpenHCL VMs (they can be used as developer platforms for the purposes of using/testing/developing OpenHCL).
Windows Client
You can use the Windows 11 2024 Update (AKA version 24H2), the third and new major update to Windows 11, as this is the first Windows version to have development support for OpenHCL VMs.
As of October 1, 2024, the Windows 11 2024 Update is available. Microsoft is taking a phased approach with its rollout. If the update is available for your device, it will download and install automatically.
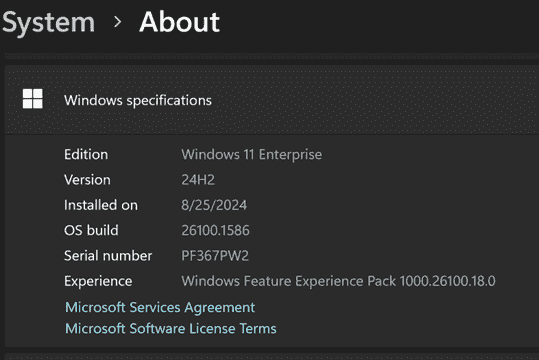
Otherwise, you can get it via Windows Insider by registering with your Microsoft account and following these instructions (you can choose the "Release Preview Channel"). You may have to click the "Check for updates" button to download the latest Insider Preview build twice, and this update may take over an hour. Finally go to Settings > About to check you are on Windows 11, version 24H2 (Build 26100.1586).
Windows Server
Instructions coming soon.
Machine setup
Enable Hyper-V
Enable Hyper-V on your machine.
Enable loading from developer file
Once you get the right Windows Version, run the following command once before starting your VM. Note that this enabled loading unsigned images, and must be done as administrator.
Set-ItemProperty "HKLM:/Software/Microsoft/Windows NT/CurrentVersion/Virtualization" -Name "AllowFirmwareLoadFromFile" -Value 1 -Type DWORD | Out-Null
File access
Ensure that your OpenHCL .bin is located somewhere that vmwp.exe in your Windows host has permissions to read it (that can be in windows\system32, or another directory with wide read access).
Create a VM
Save the path of the OpenHCL .bin in a var named $Path and save the VM name you want to use in a var named $VmName.
For example:
$Path = 'C:\Windows\System32\openhcl-x64.bin'
$VmName = 'myFirstVM'
Create the Hyper-V VM
Create VM with OpenHCL (but not Trusted Launch)
Use the -GuestStateIsolationType OpenHCL parameter to New-VM. The following snippet will create a new VM that uses OpenHCL with a firmware that you specify.
# Names, directories, etc.
# cargo xflowey will do some heavy lifting for you. You can run `cargo xflowey vmm-tests-run --build-only --dir /mnt/q/win-vmm-tests ...` from your WSL to get images, compiled OpenHCL, etc. See [cross-compile](../../../dev_guide/getting_started/cross_compile.md) and [vmm-test](../../../dev_guide/tests/vmm.md) docs for additional info.
$repoDir = "home\<your-wsl-username-for-example>\openvmm" # for prereqs below, the path relative to the root of your WSL file system where you have cloned the openvmm repo

$VmName = "OpenHCLTestVM"
$vmOsDisk = " Q:\win-vmm-tests\osdisk.vhdx" # for step (1), the location of the OS disk for the VM. E.g. Convert-VHD Q:\win-vmm-tests\images\ubuntu-25.04-server-cloudimg-amd64.vhd -DestinationPath "Q:\win-vmm-tests\osdisk.vhdx"
$firmwareFile = "Q:\win-vmm-tests\openhcl-x64.bin" # for step (1), the location of your built OpenHCL firmware.

# Import the `hyperv.psm1` module that's used by petri, e.g.
Set-ExecutionPolicy Bypass -Scope Process # See about_Execution_Policies at https://go.microsoft.com/fwlink/?LinkID=135170.
Import-Module \\wsl.localhost\Ubuntu\$($repoDir)\petri\src\vm\hyperv\hyperv.psm1

# (1) Create a VM with OpenHCL isolation mode
$vm = New-VM $VmName -generation 2 -GuestStateIsolationType OpenHCL -VHDPath $vmOsDisk -BootDevice VHD
Set-VM -VM $vm -AutomaticCheckpointsEnabled $false
Set-VMFirmware -VM $vm -EnableSecureBoot Off # your guest image might need this, for example
Set-OpenHCLFirmware -Vm $vm -IgvmFile $firmwareFile
Create VM as a Trusted Launch VM
Enables Trusted Launch for the VM.
You can use this script with no additional instructions required (simplest path).
$vm = new-vm $VmName -generation 2 -GuestStateIsolationType TrustedLaunch
.\openhcl\Set-OpenHCL-HyperV-VM.ps1 -VM $vm -Path $Path
Create other VM types
Instructions coming soon.
Set up guest OS VHD for the VM
Running a VM will be more useful if you have a guest OS image. Given that OpenHCL is a compatibility layer, the goal is to support the same set of guest OS images that Hyper-V currently supports without a paravisor.
You can pick any existing image that you have or download one from the web, such as from Ubuntu, or any other distro that is currently supported in Hyper-V.
Add-VMHardDiskDrive -VMName $VmName -Path "<VHDX path>" -ControllerType SCSI -ControllerNumber 0 -ControllerLocation 1
Using OpenHCL to relay storage
This is a brief description to help you get started. Devs have their own scripts stashed away to make some of this easier. As we make this less tedious, we'll update this with more details.
As briefly described in the architecture overview, OpenHCL can relay (a.k.a translate) storage. It can take storage that the host presents as NVMe and show that to a guest as SCSI. For architectural details, see Storage Translation.
Because the core support in OpenHCL is relatively backend-agnostic, you can also show a SCSI device to VTL2 (OpenHCL) and then re-emulate that device in OpenHCL to show it again to VTL0. This is useful for test cases primarily.
While our automated test environment, petri, has good support to set this up, you need to dive into the guts of Hyper-V's WMI implementation to set this up. We have several functions used by petri in hyperv.psm1, and those are a great starting point. You can learn more about petri in the vmm test docs.
Besides reading source code, you can also find out what commands are in the petri HyperV module by running Get-Command -Module HyperV after importing it.
While these steps guide you to create a second SCSI controller, your generation 2 VM will already be booting from a SCSI controller. You could simply use that one, and your VM will boot using OpenHCL storage relay.
# Names, directories, etc.
# cargo xflowey will do some heavy lifting for you. You can run `cargo xflowey vmm-tests-run --build-only --dir /mnt/q/win-vmm-tests ...` from your WSL to get images, compiled OpenHCL, etc. See [cross-compile](../../../dev_guide/getting_started/cross_compile.md) and [vmm-test](../../../dev_guide/tests/vmm.md) docs for additional info.
$repoDir = "home\<your-wsl-username-for-example>\openvmm" # for prereqs below, the path relative to the root of your WSL file system where you have cloned the openvmm repo

$VmName = "OpenHCLTestVM"
$vmOsDisk = "Q:\win-vmm-tests\osdisk.vhdx" # for step (1), the location of the OS disk for the VM. E.g. Convert-VHD Q:\win-vmm-tests\images\ubuntu-25.04-server-cloudimg-amd64.vhd -DestinationPath "Q:\win-vmm-tests\osdisk.vhdx"
$firmwareFile = "Q:\win-vmm-tests\openhcl-x64.bin" # for step (1), the location of your built OpenHCL firmware.
$hostLun = 5 # for step (6) and (7), LUN on the controller presented to VTL2 from the host
$vhdPath = "Q:\win-vmm-tests\foo.vhdx" # for step (6), the path to whatever VHD is added
$guestLun = 15 # for step (7), guest visible LUN and controller ID
$guestControllerId = [guid]::NewGuid()

# Import the `hyperv.psm1` module that's used by petri, e.g.
Set-ExecutionPolicy Bypass -Scope Process # See about_Execution_Policies at https://go.microsoft.com/fwlink/?LinkID=135170.
Import-Module \\wsl.localhost\Ubuntu\$($repoDir)\petri\src\vm\hyperv\hyperv.psm1

# (1) Create a VM with OpenHCL isolation mode
$vm = New-VM $VmName -generation 2 -GuestStateIsolationType OpenHCL -VHDPath $vmOsDisk -BootDevice VHD
Set-VM -VM $vm -AutomaticCheckpointsEnabled $false
Set-VMFirmware -VM $vm -EnableSecureBoot Off # your guest image might need this, for example
Set-OpenHCLFirmware -Vm $vm -IgvmFile $firmwareFile

# (2) Use the built-in Hyper-V powershell cmdlets to create a new SCSI Controller for your VM
#
# Uses the $vm that you created above
# N.B.: Adding -Passthru is required for the cmdlet to return the controller object.
$controller = Add-VMScsiController -VM $vm -Passthru

# (3) Turn on "VMBUS Redirect", required for storage relay
Set-VMBusRedirect -Vm $vm -Enable $true

# (4) Point your new SCSI controller at OpenHCL (TargetVTL == 2)
Set-VmScsiControllerTargetVtl -Vm $vm -ControllerNumber $controller.ControllerNumber -TargetVtl 2

# (5) Get the Controller ID, this is how OpenHCL can reference this particular controller:
$controllerId = [guid](Get-VmScsiControllerIdByNumber -Vm $vm -ControllerNumber $controller.ControllerNumber)
if (-not $controllerId) {
    throw "Failed to resolve SCSI controller ID; ensure the controller exists and the HyperV module is imported."
}

# (6) Attach a VHD to the host
# e.g., New-VHD -Path $vhdPath -SizeBytes 1gb -Dynamic
Add-VMHardDiskDrive -VM $vm -ControllerType SCSI -ControllerNumber $controller.ControllerNumber -ControllerLocation $hostLun -Path $vhdPath

# (7) Craft settings

# Build Base-namespace VTL2 settings (JSON) with:
# * 1 SCSI controller (guest-visible instance id: $guestControllerId)
# * 1 disk at guest LUN $guestLun
#   * Backed by a single PhysicalDevice of type vscsi with vsid $controllerId
#     and sub_device_path (host LUN) $hostLun
#
# For field definitions, see the Storage Configuration Model:
#   ../../../reference/architecture/openhcl/storage_configuration.md
$settings = @{
    version = "V1"
    dynamic = @{
        storage_controllers = @(
            @{
                instance_id = $guestControllerId.ToString()
                protocol = "SCSI"
                luns = @(
                    @{
                        location = [uint32]$guestLun
                        device_id = ([guid]::NewGuid()).ToString()
                        vendor_id = "OpenVMM"
                        product_id = "Disk"
                        product_revision_level = "1.0"
                        serial_number = "0"
                        model_number = "1"
                        physical_devices = @{
                            type = "single"
                            device = @{
                                device_type = "vscsi"
                                device_path = $controllerId.ToString()
                                sub_device_path = [uint32]$hostLun
                            }
                        }
                        is_dvd = $false
                        chunk_size_in_kb = 0
                    }
                )
            }
        )
    }
}

$settingsFile = Join-Path $env:TEMP "vtl2settings.json"
$settings | ConvertTo-Json -Depth 10 | Set-Content -Path $settingsFile -Encoding UTF8

# (8) Set settings
Set-Vtl2Settings -VmId $vm.Id -Namespace "Base" -SettingsFile $settingsFile

# (9) start your VM
Start-VM -VM $vm