Windows - Hyper-V
Hyper-V has support for running with OpenHCL when running on Windows. This is the closest configuration to what Microsoft ships in Azure VMs, the only difference being that Azure uses Azure Host OS (as opposed to Windows Client or Windows Server).
Get a Windows version that has development support for OpenHCL
Note that Windows Client and Windows Server do not have production support for OpenHCL VMs (Microsoft does not support production workloads on OpenHCL VMs on Windows Client and Windows Server), but certain versions have development support for OpenHCL VMs (they can be used as developer platforms for the purposes of using/testing/developing OpenHCL).
Windows Client
You can use the Windows 11 2024 Update (AKA version 24H2), the third and new major update to Windows 11, as this is the first Windows version to have development support for OpenHCL VMs.
As of October 1, 2024, the Windows 11 2024 Update is available. Microsoft is taking a phased approach with its rollout. If the update is available for your device, it will download and install automatically.
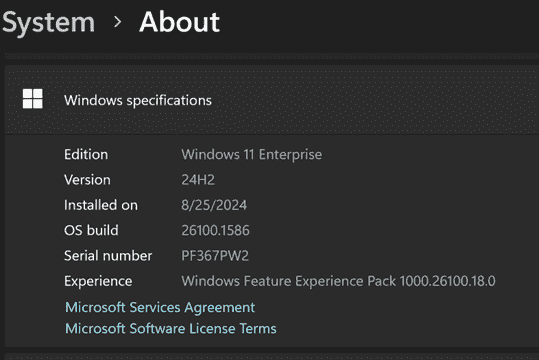
Otherwise, you can get it via Windows Insider by registering with your Microsoft account and following these instructions (you can choose the “Release Preview Channel”). You may have to click the Check for updates button to download the latest Insider Preview build twice, and this update may take over an hour. Finally go to Settings > About to check you are on Windows 11, version 24H2 (Build 26100.1586).
Windows Server
Instructions coming soon.
Machine setup
Enable Hyper-V
Enbable Hyper-V on your machine.
Enable loading from developer file
Once you get the right Windows Version, run the following command once before starting your VM. Note that this enabled loading unsigned images, and must be done as administrator.
`Set-ItemProperty "HKLM:/Software/Microsoft/Windows NT/CurrentVersion/Virtualization" -Name "AllowFirmwareLoadFromFile" -Value 1 -Type DWORD | Out-Null`
File access
Ensure that your OpenHCL .bin is located somewhere that vmwp.exe in your Windows host has permissions to read it (that can be in windows\system32, or another directory with wide read access).
Create a VM
Save the path of the OpenHCL .bin in a var named $Path and save the VM name you want to use in a var named $VmName.
For example:
$Path = 'C:\Windows\System32\openhcl-x64.bin'
$VmName = 'myFirstVM'
Create VM as a Trusted Launch VM
Enables Trusted Launch for the VM.
You can use this script with no additional instructions required (simplest path).
$vm = new-vm $VmName -generation 2 -GuestStateIsolationType TrustedLaunch
.\openhcl\Set-OpenHCL-HyperV-VM.ps1 -VM $vm -Path $Path
Create other VM types
Instructions coming soon.
Set up guest OS VHD
Running a VM will be more useful if you have a guest OS image. Given that OpenHCL is a compatibility layer, the goal is to support the same set of guest OS images that Hyper-V currently supports without a paravisor.
You can pick any existing image that you have or download one from the web, such as from Ubuntu, or any other distro that is currently supported in Hyper-V.
`Add-VMHardDiskDrive -VMName $VmName -Path "<VHDX path>"-ControllerType SCSI -ControllerNumber 0 -ControllerLocation 1`